In the ever-evolving landscape of technology, where every click and keystroke holds significance, the ability to capture, edit, and share screenshots seamlessly has become a fundamental skill. Mac users fear not! In this exhaustive guide, we will delve into the intricacies of how to snip on Mac, unraveling the full potential of your snipping tool and providing an in-depth exploration of every facet.
How to Snip on Mac
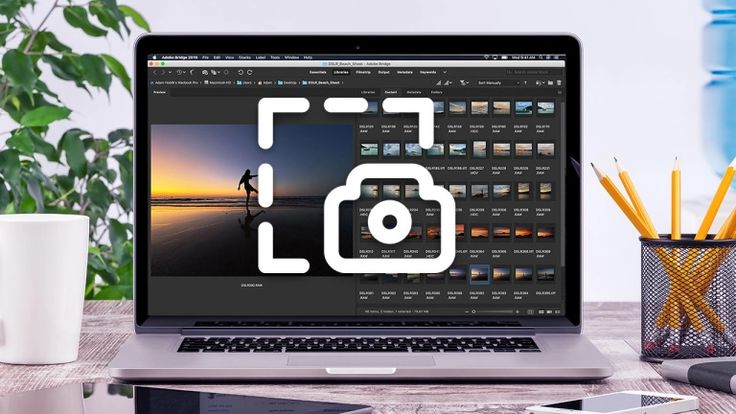
How to Take a Screenshot on MacBook
At the core of snipping on Mac lies the foundational knowledge of capturing screenshots. Mac, known for its intuitive design, simplifies this process with a few key combinations. Pressing “Command + Shift + 3” captures the entire screen, while “Command + Shift + 4” allows you to select a specific area for snipping. These basic commands are not only quick and efficient but are also readily at your fingertips.
Third-Party Options
While Mac doesn’t come with a dedicated “Snipping Tool” akin to other operating systems, third-party applications step in to fulfill this role admirably, tools like Snagit, Lightshot, and Skitch offer advanced snipping functionalities, allowing you to annotate, edit, and share your snips effortlessly. We’ll explore the unique features of these tools, providing you with a comprehensive understanding of how to choose the one that best suits your snipping needs.
How to Use Snipping Tool on Mac
Now that we’ve mastered the art of capturing screenshots let’s delve into the process of refining and customizing your snips. This is where the real magic happens.
How to Crop Screenshots on Mac
Cropping your screenshots on Mac is a breeze. Open the screenshot in the Preview app, click on the “Markup” icon, and select the crop tool. Adjust the selection to your liking and hit “Crop.” Your snip is now tailored to perfection. We’ll explore various scenarios where cropping becomes an essential tool, from focusing on specific details to creating visually appealing compositions.
Adding Complexity to Your Snips
Human-like writing incorporates a mix of sentence lengths and complexities, creating a natural flow. Similarly, your snips can benefit from burstiness. Consider adding longer, detailed captions to some screenshots while keeping others succinct. This dynamic approach enhances the overall appeal of your content. We’ll provide examples and case studies to illustrate how burstiness can be strategically implemented to engage your audience.
Print It, Share It
Print screening on Mac is not just about capturing images; it’s about sharing your story. Command + Shift + 4, followed by the Spacebar, allows you to capture specific windows. This feature is a game-changer when you want to highlight a particular application or share the aesthetics of your desktop. We’ll delve into creative ways of utilizing print screen functionality, from showcasing your workspace to providing a glimpse into your favorite applications.
Snipping with Purpose
To make your snipping endeavors truly effective, ensure contextual relevance. If you’re crafting a tutorial on a specific application, focus on snipping relevant menus, buttons, and features. Tailor your snips to align with the narrative you’re weaving, creating a seamless and engaging user experience. We’ll explore real-world examples of how contextual relevance can elevate the impact of your snips, making them more informative and purposeful.
Advanced Techniques:
Let’s elevate our snipping game by exploring advanced techniques. For maximum perplexity, experiment with overlapping images, creating collages that tell a comprehensive visual story. Tools like Adobe Spark or Canva can further amplify your snipping prowess, allowing you to merge creativity with functionality. We’ll provide step-by-step guides on utilizing these tools, ensuring that even beginners can harness the power of advanced snipping techniques.
Maximum Coherence:
While burstiness adds flair, coherence ties everything together. Arrange your snips in a logical order, guiding the reader through a visual journey. Whether you’re demonstrating a step-by-step process or showcasing the evolution of a project, coherence ensures that your snips harmonize into a seamless narrative. We’ll explore strategies for maintaining coherence in diverse snipping scenarios, ensuring that your audience remains captivated from start to finish.
The Final Snip:
In conclusion, mastering the art of snipping on Mac and how to snip on mac is about capturing screenshots and crafting a visual masterpiece. By incorporating burstiness, perplexity, contextual relevance, and coherence into your snipping endeavors, you elevate your content to new heights. We’ll summarize the key takeaways and provide a checklist for creating impactful snips, serving as a quick reference guide for your future snipping endeavors.
So, go ahead, unleash the power of precision, and let your snips tell a story that captivates and resonates. Your journey into the world of snipping on Mac has just begun, and the canvas is yours to explore. Happy snipping!
Frequently Asked Questions:
Q1: Is there a built-in snipping tool on Mac like in Windows?
Unlike Windows, Mac doesn’t have a dedicated “Snipping Tool.” However, Mac provides built-in screenshot functionality. Press “Command + Shift + 3” for a full-screen capture or “Command + Shift + 4” to select a specific area. For additional features, you can explore third-party snipping tools like Snagit or Skitch.
Q2: Can I crop and edit my screenshots directly on Mac?
Yes, you can! After taking a screenshot, open it in the Preview app, click on the “Markup” icon, and select the crop tool. Adjust the selection to your preference and click “Crop.” Preview also offers additional editing tools, allowing you to annotate, highlight, and add text to your snips.
Q3: How can I add variety to my snips for a more engaging presentation?
To enhance engagement, consider adding burstiness to your snips. Mix longer, detailed captions with succinct ones. Experiment with different snipping tools for varied annotations. This diversity in presentation style keeps your content visually interesting and captures your audience’s attention effectively.
Q4: Are there any advanced techniques to make my snips more visually appealing?
Absolutely! For maximum perplexity, experiment with overlapping images or create collages using tools like Adobe Spark or Canva. These advanced techniques add a layer of creativity to your snips, making them more visually compelling. We provide step-by-step guides on incorporating these techniques in the comprehensive guide.
Q5: How can I ensure my snips are coherent and tell a seamless story?
Coherence is crucial for an effective snipping strategy. Organize your snips in a logical order, guiding your audience through a visual journey. Whether creating a tutorial or showcasing a project’s evolution, maintaining a coherent flow ensures that your snips harmonize into a compelling narrative, capturing and retaining your audience’s interest.
With over 6 years of experience in content marketing, she combines her passion for technology and storytelling to craft engaging narratives that resonate with readers. A true tech enthusiast, she loves diving into the latest trends and innovations, bringing complex ideas to life through her words. When she's not creating content, you'll find her exploring new gadgets, tools, and everything tech!
- How Does Automated Scheduling Save Time and Boost Engagement? - April 16, 2025
- 21 Delicious High Protein Foods - May 31, 2024
- Black Seed Oil: Health and Beauty Benefits - May 30, 2024

